

Store-bought candles charge a lot for something you can make yourself in under an hour.
DIY candles let you choose your own scents, control what goes in them, and create something that fits your home perfectly. Once you learn the basics, you can make batches as gifts, keep your home stocked year-round, and experiment with new fragrance combinations whenever you want.
This guide covers everything you need to start, from materials to pours to common mistakes.
What You Need to Make DIY Candles
The supplies are simple and most of them are reusable across many batches.
You need wax, wicks, fragrance oil or essential oils, a container to pour into, and a double boiler setup for melting. A thermometer is highly recommended because wax temperature matters more than most beginners expect.
For wax, soy wax is the most popular beginner choice. It is clean-burning, holds scent well, and easy to find at craft stores. Beeswax is more expensive but has a natural honey scent and a beautiful finish. Paraffin melts easily and is the cheapest option, though it burns faster than soy.
Wicks need to match your container diameter. Too thin and the candle tunnels down the center. Too thick and you get an oversized flame. Most wick packaging includes a sizing guide based on container width.
How to Make a Basic DIY Candle Step by Step
Follow this process for your first candle and you will get consistent, clean results.
Prepare your container first. Center the wick and hold it in place with a wick centering tool, a pencil laid across the top, or two chopsticks. The wick needs to stay straight while the wax hardens.
Melt your wax in a double boiler over medium heat. Do not microwave candle wax. Stir slowly and watch the temperature. For soy wax, you want to add fragrance around 185 degrees Fahrenheit and pour around 135 to 145 degrees.
Add your fragrance oil once the wax reaches the right temperature. Use about one ounce of fragrance per pound of wax as a starting point. Stir for two full minutes to fully incorporate the scent. If you rush this step, your candle may have fragrance pooling or a weak throw.
Pour slowly into your prepared container and avoid moving it while it sets. Let it cool fully at room temperature for at least 24 hours before trimming the wick to a quarter inch and lighting it.
DIY Candle Ideas Worth Trying
Once you have the basic pour down, you can go in a lot of different directions.
Scented container candles in mason jars or vintage cups are the easiest starting point. They make great gifts and look beautiful on shelves and tables. Mix scents like lavender and vanilla, or cedar and citrus, to create combinations you will not find at any store.
Layered candles use multiple colors poured at intervals, each allowed to partially set before the next layer goes in. The result is a striped or gradient effect that looks impressive and requires no special tools.
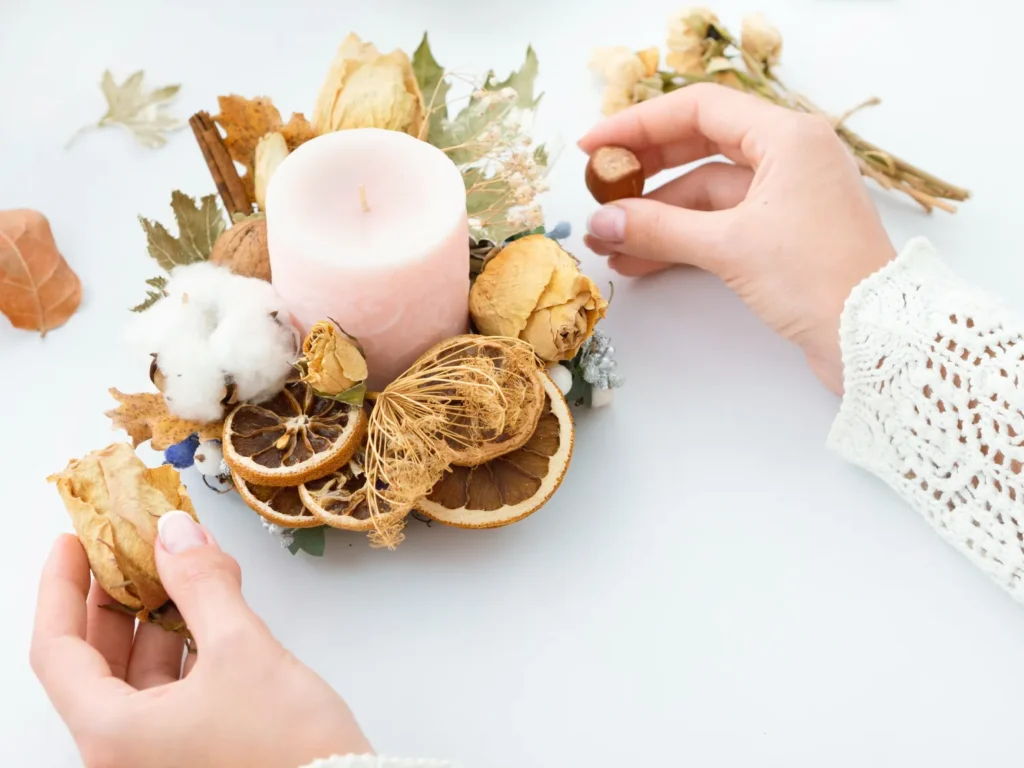
Botanical candles embed dried flowers, herbs, or citrus slices into the surface of the wax. These are decorative rather than functional in most cases, so they work best as display pieces rather than candles you burn regularly.
Beeswax sheet candles skip the melting entirely. You soften a sheet of beeswax with a heat gun or hair dryer, lay a wick along the edge, and roll it up tightly. You can make one in five minutes, which makes them a great beginner project or a quick handmade gift.
Common DIY Candle Problems and How to Fix Them
Even experienced candle makers run into issues. Here is what to expect and how to handle it.
Sinkholes form in the center of the wax as it cools and contracts. Fix them by pouring a small amount of reserved melted wax over the top to fill the dip. This is a normal part of candle making, not a mistake.
Frosting is a white, powdery layer that forms on soy candles. It does not affect how the candle burns and it actually signals that you used natural soy wax. You can reduce it by pouring at a slightly lower temperature.
Weak scent throw usually means the fragrance was added at the wrong temperature or not stirred long enough. Stick to the recommended temperatures for your wax type and stir your fragrance in for a full two minutes before pouring.
Tunneling happens when the wick is too small for the container. The candle burns a narrow channel straight down and leaves wax on the sides. Always use the right wick size and burn your candle long enough on the first use to melt the full surface to the edges.